3D  LabteK
follow us on twitter
  • Home
  • Our Improvement
    • Alu X-Carriiage Rev 02
    • 3D Models
  • Shop
  • 3D Printers
    • DIY Printer
    • Prusa i3 Full Mchanical Set
    • 3D Printer Parts >
      • Prusa i3
      • Prusa MENDEL V2
      • MENDEL 90
      • 3D Labtek Z axis Coupler
      • GREG's Geared Estruder
      • WADE Geared Estruder
    • 3D Labtek Hot End >
      • Hotend Spares
    • Accessories >
      • Motion
  • Filament
  • Service
    • UsefulLink
    • Manuals >
      • Pi3-2014 >
        • VI-FRAME
        • VI-Y-Carriage
        • VI-X-Axis
        • VI-Z-Axis
        • VI-GREG
    • Download
    • Video
  • Contact us
  • Blog

X-END Parts Update

9/21/2014

2 Comments

 
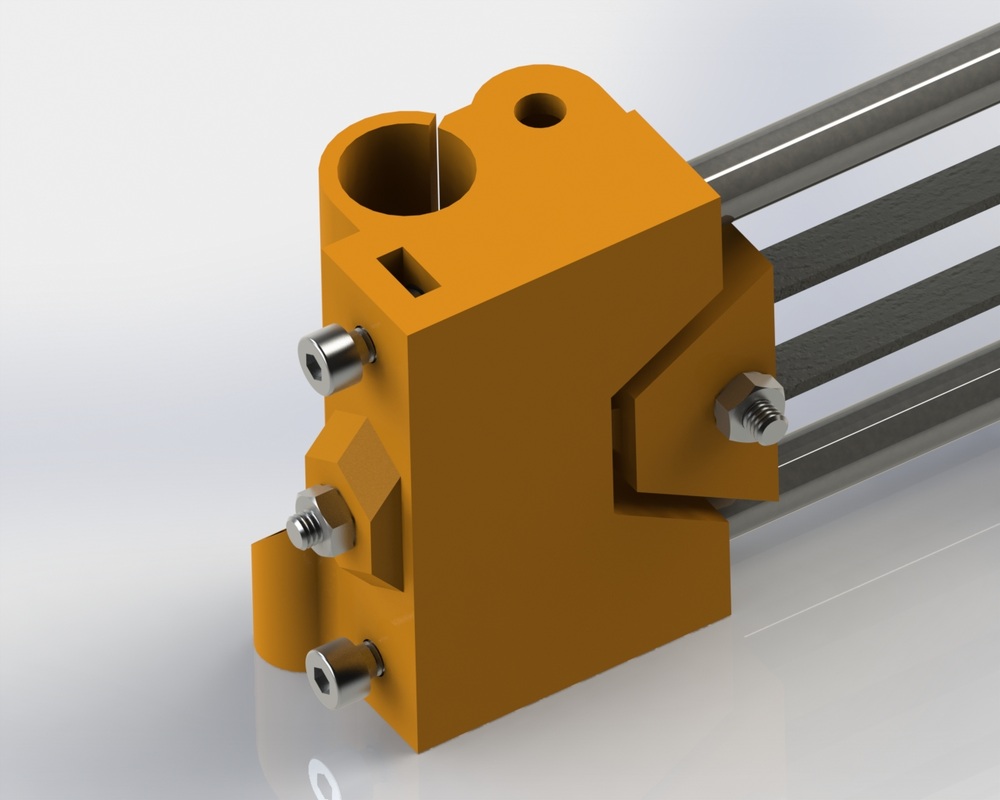
Here You can find the new release of the  improved X -Ends Parts.
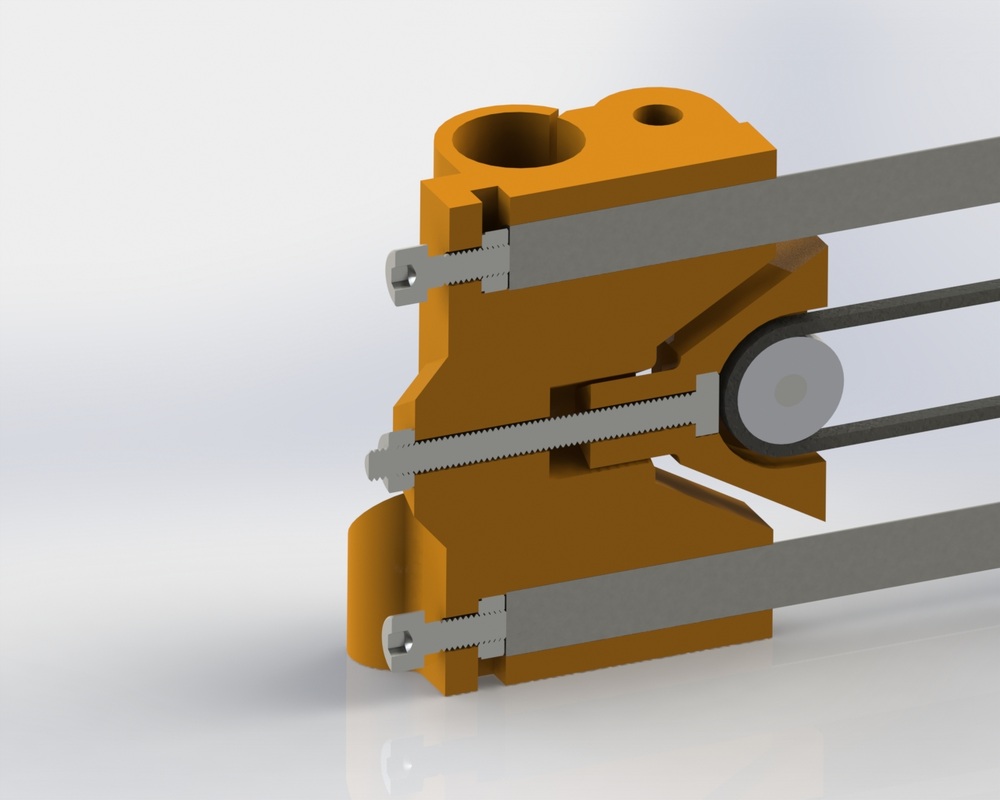
The new release improve the strength of the X-Belt tensioner, prolonged M5 Nuts slots 
Easy Fix of the M4 Nuts in the X-End Idler to lock the smooth rod position.


Picture
Picture
3dlabtek-x-ten
File Size: 78 kb
File Type: stl
Download File

3dlabtek-x-idler
File Size: 137 kb
File Type: stl
Download File

3dlabtek-x-motor
File Size: 276 kb
File Type: stl
Download File

2 Comments
John
6/4/2015 12:24:15 am

Hi, I have build a custom Prusa I3 using parts from a PBLC V2 I had. I downloaded and used your x axis parts for my machine. The problem i am having is that with the motor on the right my machine mirrors my printed parts. I can't put my endstop on the left and flip my motor plug. Is there a way in my EPPROMS to flip my home to be front left corner. I tried M92 -80.00 (GT2 step value) it worked in sending the motor the right way but would not recognize my end stop. Any advice would be great. Side note I did not compile my own firmware I used one from Printrbot that worked and just change the print size and other values through the EPPROMS. I am no firmware genius!!

Reply
3D LabteK
6/4/2015 02:08:30 am

Hi,
There are two ways to fix the mirrored parts.
The first of course is to print our parts for the left motor side that are available on our download page or the improvement page.
The second, living the installation like is it actually is to act on the firmware itself.
the trick is to change the X-min pin with the x-max pin in the pin.h of the firmware and upload again.
Just pay attention to change the pins according to your board type.
if you need more info just contact me directly trough the contact form
and I'll be glad to give you further information if required.

Hope it will help

Reply


Leave a Reply.

    Archives

    May 2015
    February 2015
    January 2015
    December 2014
    November 2014
    October 2014
    September 2014
    August 2014
    July 2014
    June 2014
    April 2014
    February 2014
    January 2014
    November 2013
    July 2013
    June 2013
    May 2013
    April 2013

    Categories

    All
    Full Metal Hot End
    News
    Printed Parts
    Protptype

    RSS Feed

Powered by Create your own unique website with customizable templates.